Spring Outfit Of The Day: Bright Orange Maxi Skirt
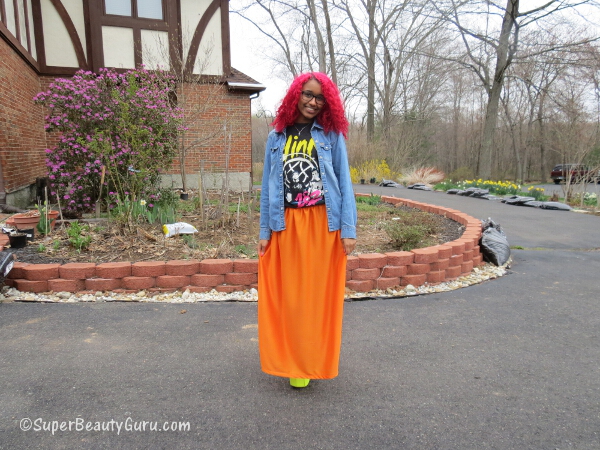
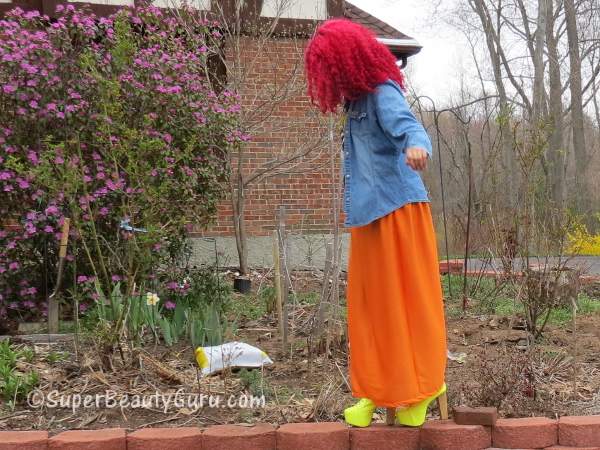
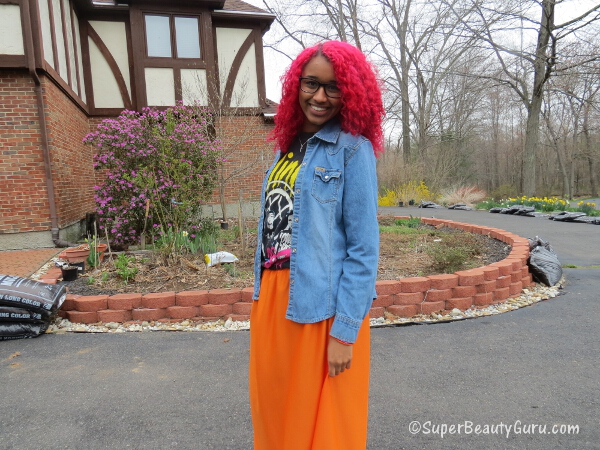
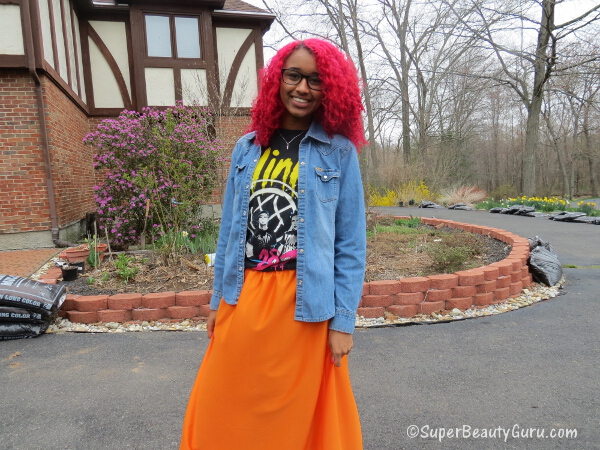
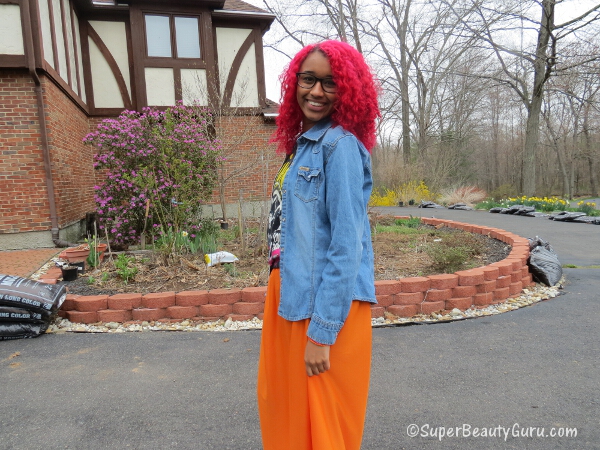
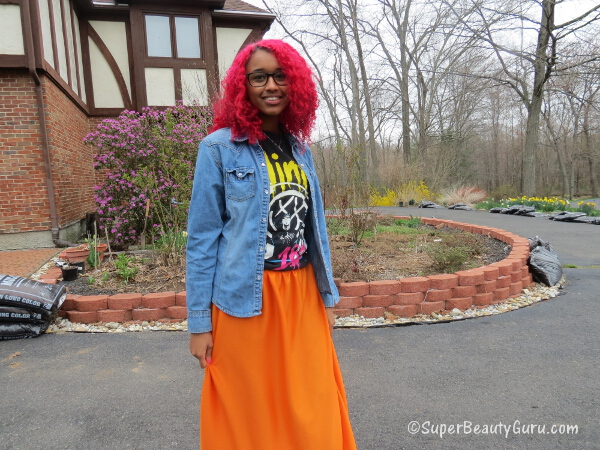
Hey fashionistas! Today I’m showing you what I wore today for school. It’s a great Spring outfit, and it’s super duper colorful! This outfit has bits of hipster and punk influence, but is also pretty at the same time. It has a bunch of different bright colors (including my hair lol ^_^) that make it interesting and perfect for the warmer weather!
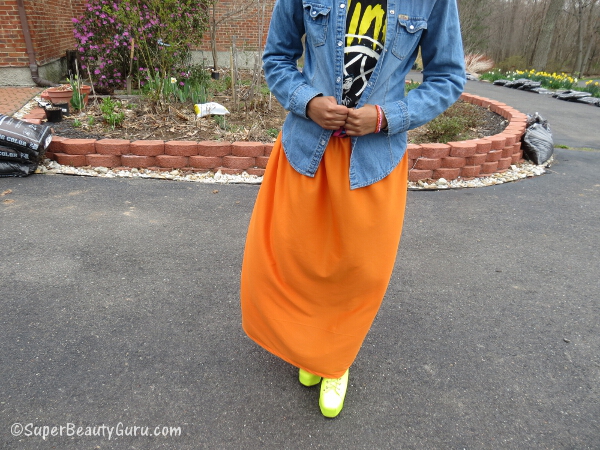
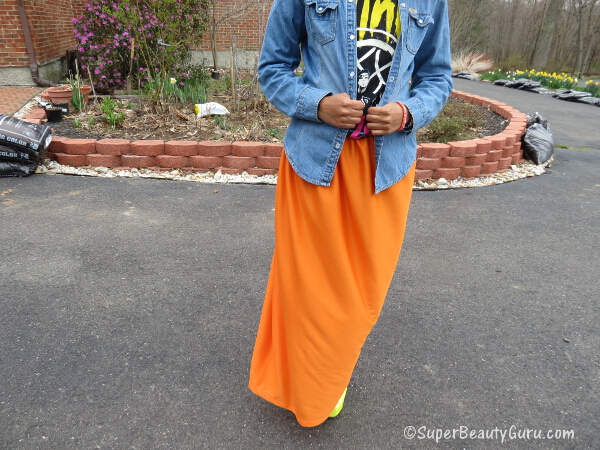
I made the skirt myself because I love maxi skirts and the fabric at the store was just calling my name! If you don’t know how to wear a maxi skirt, then this outfit will be a good example of how to wear a maxi skirt. It’s perfect to pair with a band tee and denim jackets. Top it off with some killer shoes and you have yourself an awesome outfit!
Here’s a video showing the outfit, and a list of places items were purchased:
If you cannot view the above video, click here for the tutorial on this look: Spring Outfit Of The Day: Neon Orange Maxi Skirt
Check out my Fashion and Beauty YouTube Channel, and don’t forget to Subscribe!
Where Clothing Items Were Purchased:
Tops
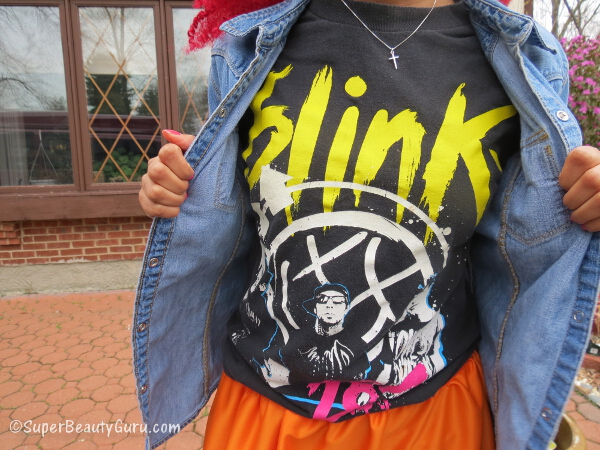
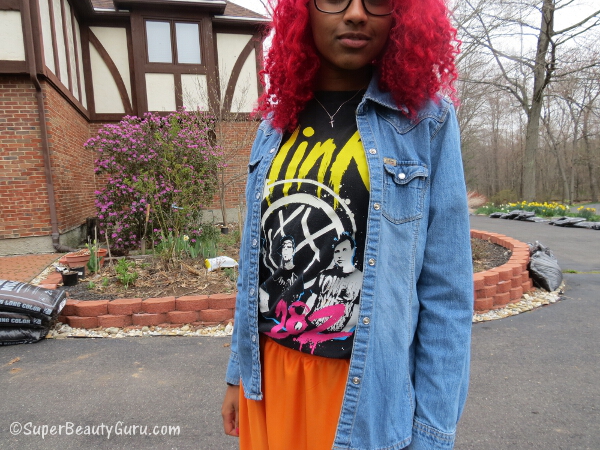
-Blink 182 Band Tee – Salvation Army Thrift Shop
-Denim jacket – from my Aunt Carlene [buy similar here]
Bottom
-Neon Orange Maxi Skirt – DIY [buy similar here] <— great price
Shoes
-Neon Yellow Chunky Heels – Color [buy here]
Accessories
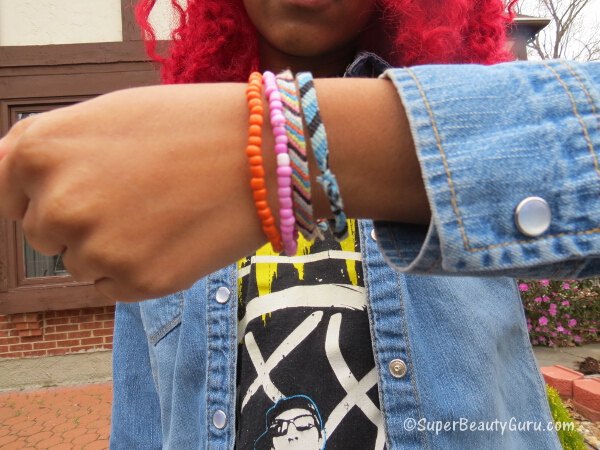
-Bracelets – DIY and gift [buy similar here]
-Necklace – gift [buy similar here]
Subscribe by email if you like my style
Subscribe with: Any Feed Reader | Bloglovin’
Fashion Gallery
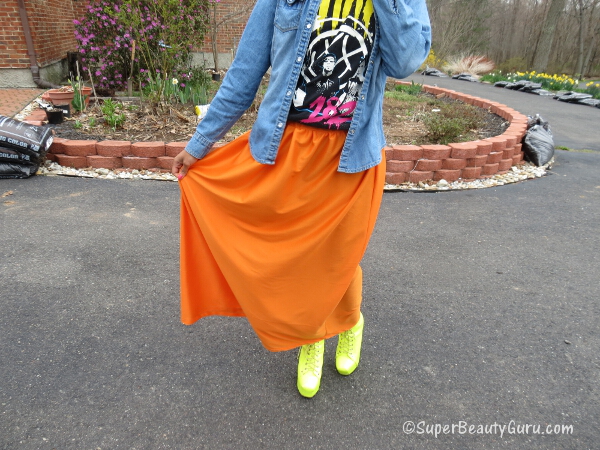
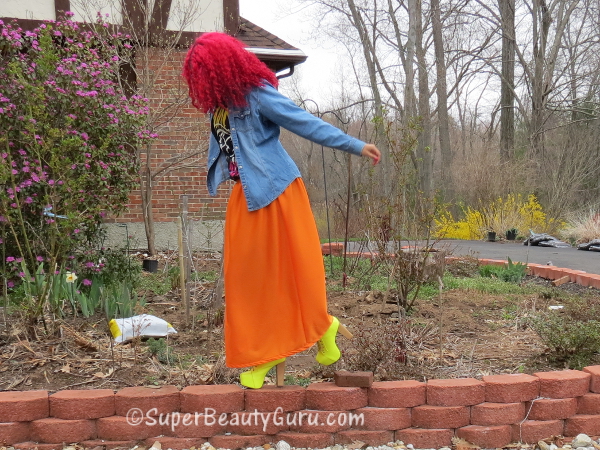
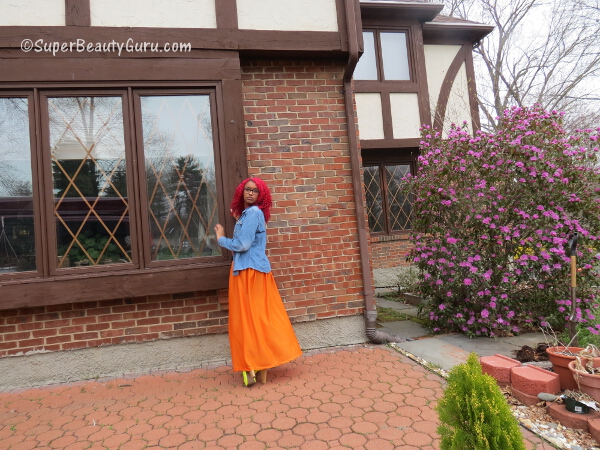
If you find this outfit interesting, or just find fashion photos interesting in general, then here are a bunch of pictures for your enjoyment! I really like how bright the neon orange maxi skirt is, and how it flows in the wind!
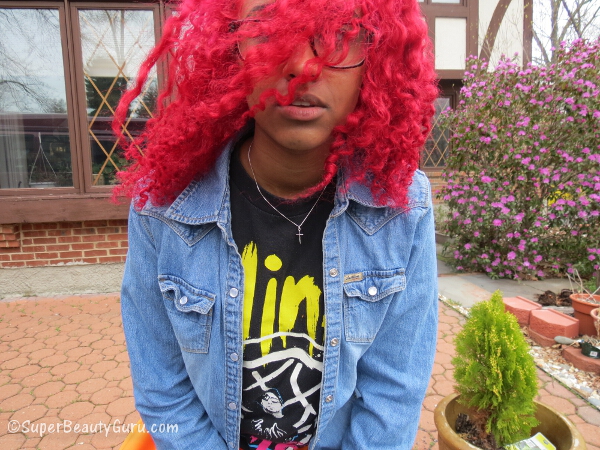
It was very windy out that day. Great for the skirt, but bad for hair!
These are the colorful bracelets I wore. I made the two friendship bracelets, and I think I got the other two from a friend. Oh yeah, Leila gave them to me for my last birthday ^_^
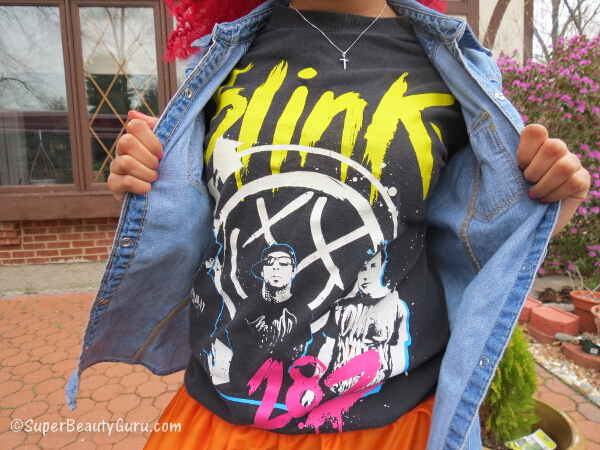
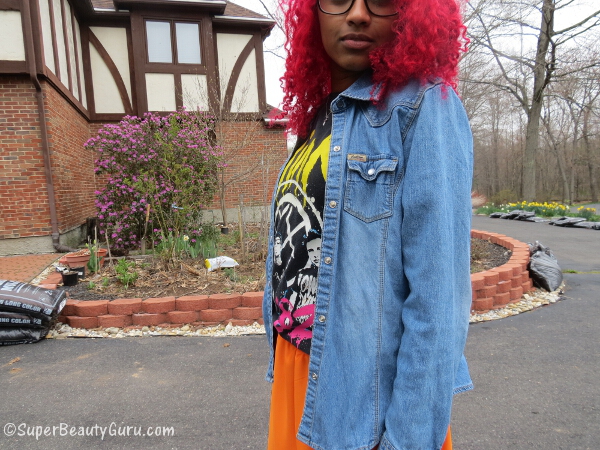
Yess! Do you guys like Blink 182? Tell me in the comments! If you’ve never heard of them, I’m giving you the assignment to look them up! They’re great. This shirt is from a thrift shop, and you can always find inexpensive band tees there if that’s something you’re into!
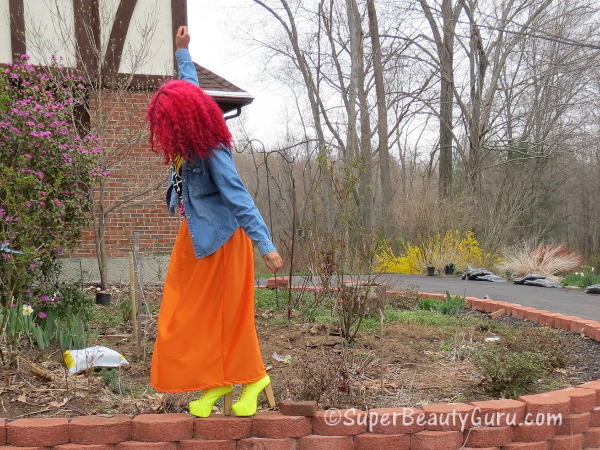
It was soo easy to keep my balance on this small wall… okay lies, I almost lost my balance once, but it made cool pictures!
Do I look like an airplane in this?
Yup. So there’s my face!
Notice the flowers in the background are just starting to bloom! I can’t wait for all the color to return to earth! haha
The denim jacket is a vintage piece from my Aunt Carlene and I love it!
The maxiskirt I made turned out to be very flowy. Just the way I like it!
Here are my glasses! I got them like 3 years ago and thought they were so cool! I was the only one I knew with glasses like these, but now everyone and their mother wears them and it’s really annoying. They’ve lost their uniqueness :/
Tell me what you think about this outfit in the comments! I know it’s a little crazy but if you think so, tell me! I just like talking to you guys ahah
Related Posts:
–Easter / Spring Nail Tutorial
Video Transcribed:
Hey guys! Today I’m gunna show you a quick outfit of the day for SPRING TIME! This is the outfit that I wore to school today, and it was super bright and colorful, just like Spring. I waited all winter to start wearing skirts and t-shirts again, and couldn’t be happier that it’s Spring. Also I made the skirt yesterday and was dying to wear it!
The graphic t-shirt I’m wearing is a band tee for Blink 182. The band is great and so is the design on their shirt, which I got from a Salvation Army.
This denim jacket you see me wearing is a vintage piece from my aunt.
Now I finally get to talk about the skirt! So this is a skirt I made yesterday in my sewing class. I finished all of the requirements for the year and had extra time, so yesterday I brought in some neon orange fabric and started making this maxi skirt. I got super into it so I stayed after school to finish it, and got to wear it today as the focus of my outfit. Yay for bright colors!
So these amazing shoes are my bright neon yellow chunky heel boots from MakeMeChic.com. They’re my favorite shoes ever and I love them so much! Even though they’re like 6 inches, they’re pretty comfortable to walk in so I think it’s fine wearing them to school.
I didn’t want to make my outfit any busier, so I wore a simple silver cross necklace that I got as a gift.
I stacked on a few colorful bracelets from who knows where, and a couple friendship bracelets I made myself.
And of course I’m wearing my glasses too!
So that’s it for my outfit! I’ll have links to everything on my blog which is in the description box below, and if you liked my video, please subscribe! If you want to show me your Spring outfit, post it as a video response!
Thanks for watching and I’ll see you in my next video, bye!!
Thanks for stopping by! Please subscribe to my blog if you like it! xoxo Amber C Johnson from Super Beauty Guru <3
How to Make Galaxy Shorts DIY
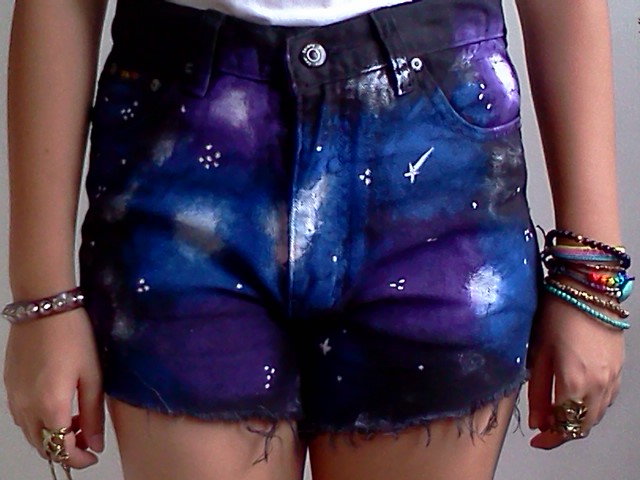
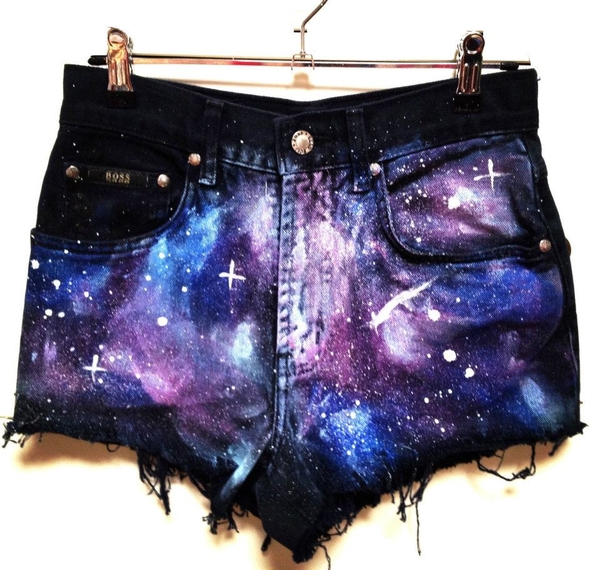
Hey everyone! I have been loving the galaxy clothing trend I’ve seen lately online (and by lately I mean like 10 times a day for the past year) and I really want to try it out for myself. One of the best ways to wear this galaxy trend is on your shorts. I love the print on leggings, shorts, shirts, shoes (the Jeffery Campbel Galaxy Print Lita’s are to die for!) and I love the galaxy print nail design!
Here are a few pictures of the trend that I am talking about (note that these are NOT my shorts, I found these pictures on tumblr):
(source)
(source)
Here’s a tutorial on how to turn a pair of regular black denim shorts into a pair of these awesome galaxy printed ones!
Steps
1 Get a pair of black or dark denim shorts. If you only have a pair of jeans but would still like to achieve this look, you can use those, or cut your jeans into a distressed pair of shorts. I have a tutorial on how to do that, so click the linked text to see that tutorial. The ideal color of the denim you should use is black, but a very very dark wash jean would do. Also, if you don’t have black, you can always dye your shorts black before you start. If you want to distress them, now is your chance!
2 Now you want to get some fabric paint and sponges to do this design. Get a couple blues, purples, and a white paint.
3 Use your sponge to sponge on the lightest blue you have. Now sponge this across the entire front, but leave gaps and kind of make the design go in a horizontal pattern. Now repeat with the darker blue and purples.
4 With your white, sponge a bit into different sized blobs, but keep them small. These will be solar systems.
5 Use your white again, but this time with a tool like a ball-point pen, to make tiny dots that will be stars. You can cluster them around the white blobs to make it seem more like a solar system, and scatter some in random places. Use the tip of the pen to make small dots. Also vary the size a bit. To make larger dots, which will be planets, flip over the pen and use the back dipped in white paint. You can also make flattened out ovals to be a solar system if you want, but use a sponge for that.
6 Let your shorts dry for at least a day, and now you’re done! Wear them with style girl! And if you try this tutorial out, post a comment down below telling me how well they turned out! Of you can tweet me a picture here!
I hope you all enjoyed and learned from this tutorial!
How to Fringe a Shirt DIY
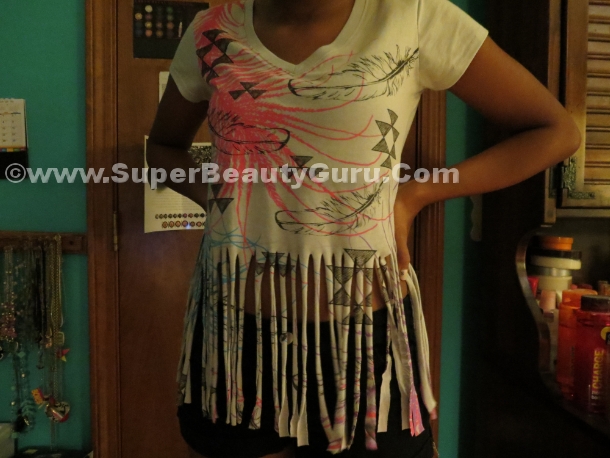
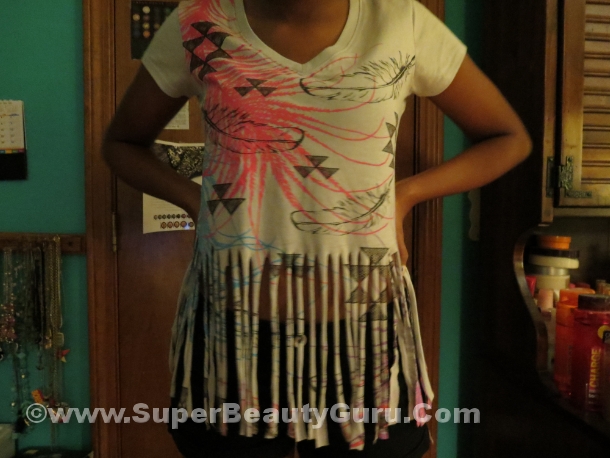
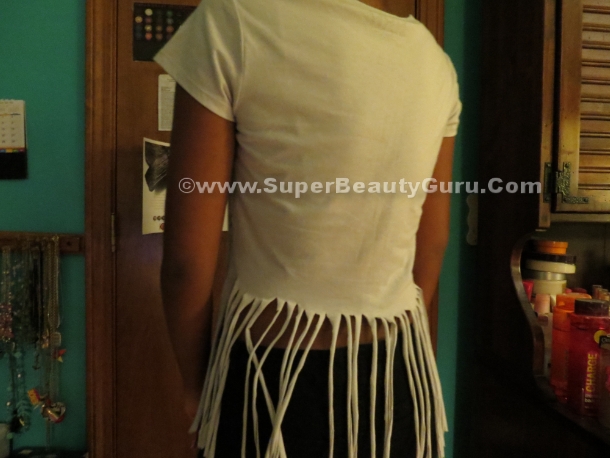
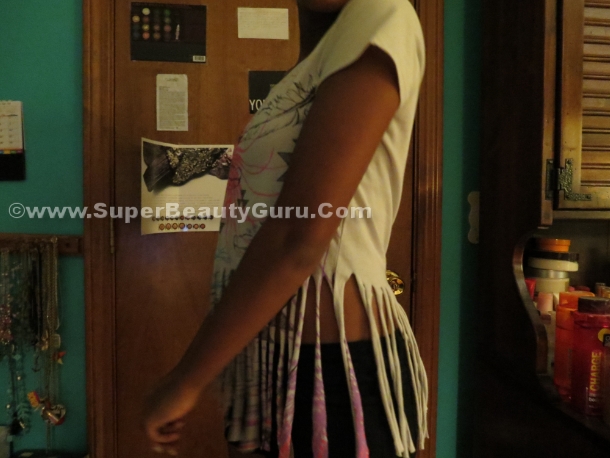
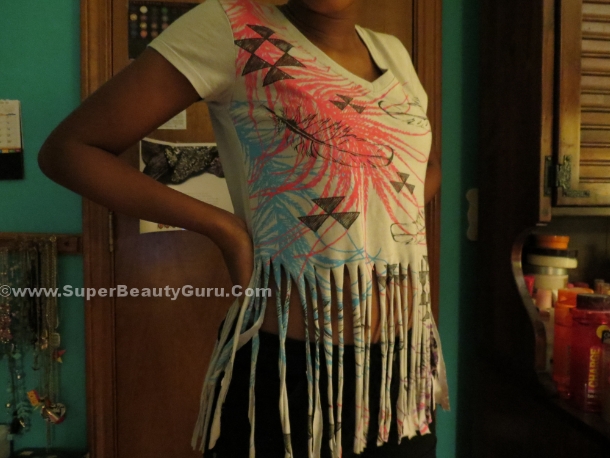
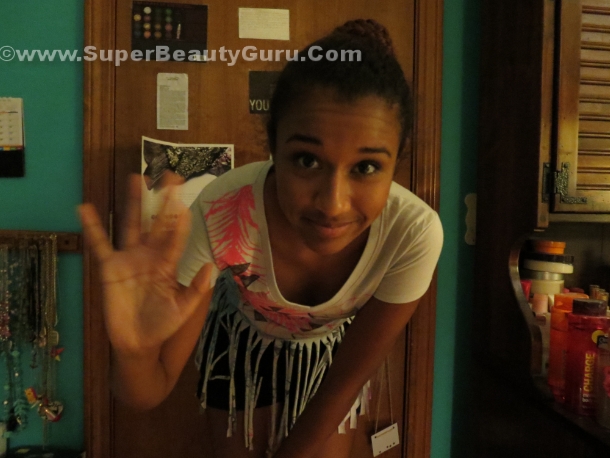
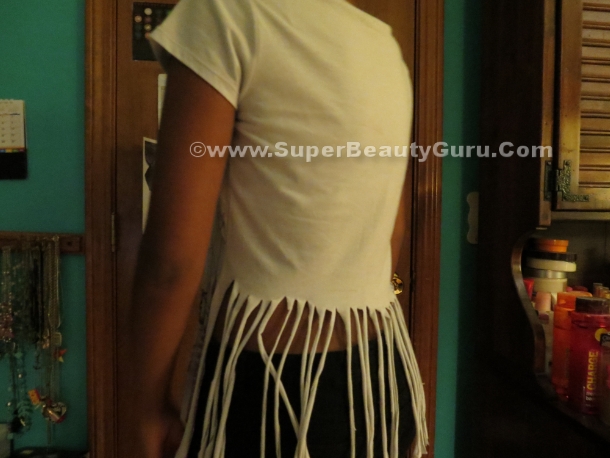
Hey everyone! Today I’m going to show you how to create a fringed shirt out of a regular t-shirt.
This is a really simple and easy do it yourself clothing modification tutorial. I show you how to turn a regular cotton shirt into a cool fringed top. If you have a shirt laying around that you don’t wear because it’s pretty loose on you, this is a great way to get some use out of it. All you need are a pair of scissors and some spare time and you can get really creative and transform your old shirt into something new. The fringe trend is really cute, so I encourage you to try it out!
Here are all the Steps and Products I used:
If you cannot view the above video, click here for the tutorial on this look: DIY Fringe Shirt tutorial: How to Fringe a Shirt
Subscribe to my Fashion and Beauty YouTube Channel!
Steps
1) Get a cotton shirt that you want to fringe
2) Try it on and find how high you want the fringe to come.
3) Mark the desired height of your fringe with a pencil. Use a pencil, white eyeliner, or chalk. Don’t use something like a pen or marker because those won’t come out of the shirt. The area you mark will tell you where to stop cutting, but won’t be gone once you’re done cutting so you want to make sure whatever you use to mark the shirt washes out!
4) Get a pair of scissors and cut off the bottom seam of the shirt.
5) Use your scissors to cut vertical strips up to the marked line. Try to make all the strips about half an inch wide, and evenly space them. It doesn’t have to be super perfect, but try to be neat.
6) Once you cut the strips all around the shirt, gently tug on each of them to change the boxy rectangle shaped fabric into more of a curled cylinder shape. Try on your shirt and you’re done! You have now changed a boring old tee into a trendy fringed top with just a pair of scissors!
Tools Needed
-a cotton shirt that you want to fringe
-a pair of scissors that cut through cloth easily
-fingers
Photo Gallery
Thanks for stopping by! Please subscribe to my blog if you like it! xoxo Amber C Johnson from Super Beauty Guru <3
How To Turn Jeans Into Distressed Jean Shorts Tutorial
Hey everyone! Today I’m going to show you how to create how to turn jeans into distressed shorts.
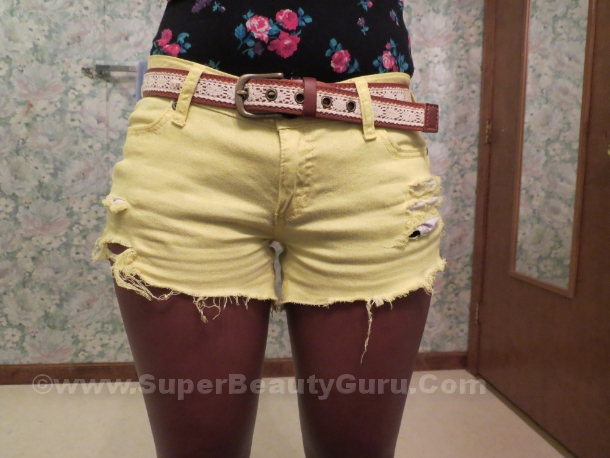
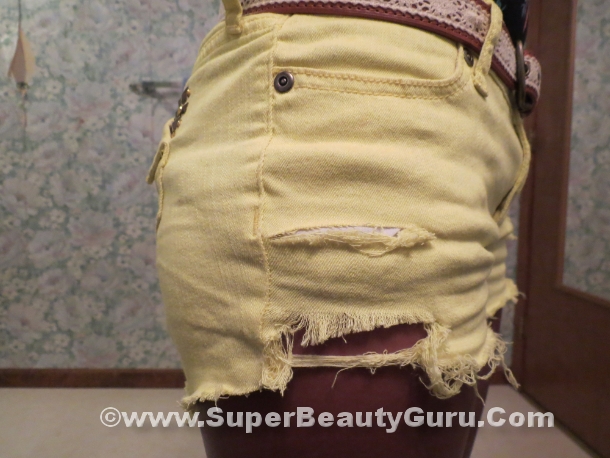
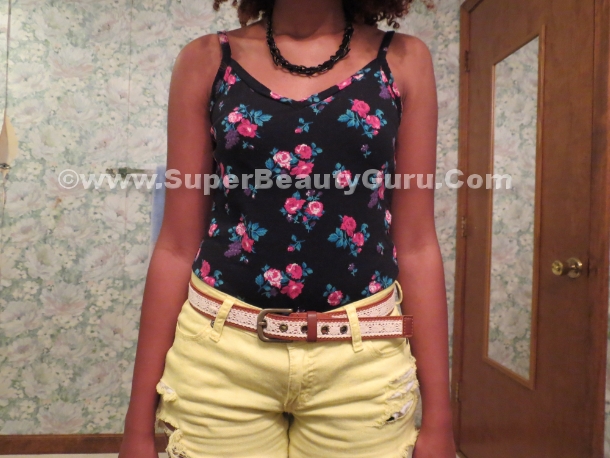
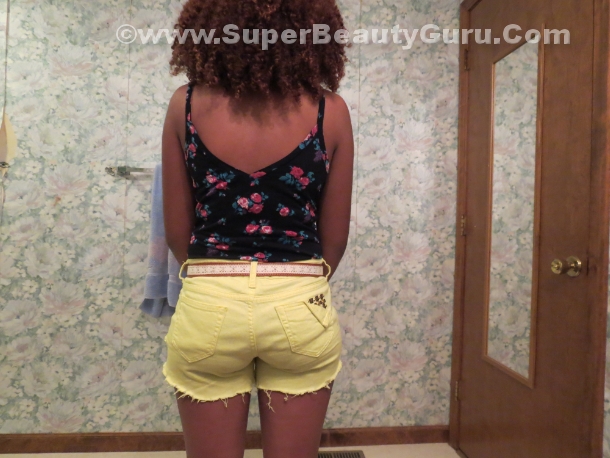
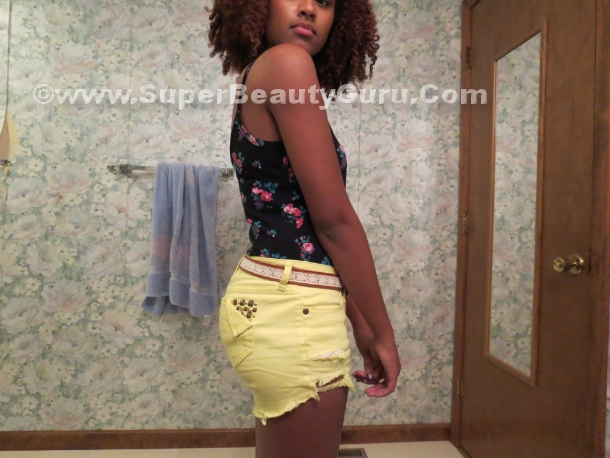
I had a pair of bright yellow skinny jeans that looked great on me, but unfortunately, they had a stain on them on the pant leg. I tried everything to remove the stain, but it didn’t budge, so instead of getting rid of the jeans, I decided to turn them into a pair of shorts. I decided to make them into a pair or distressed shorts because I love that look, and it’s really fun to do.
If you have a pair of jeans that were like mine, stained lower down on the leg area, or perhaps yours fit well, except the leg doesn’t go down far enough. If that is the case, don’t get rid of them! Simple turn your long pants into short pants. You can do this with any type of pants, but only attempt to distress denim shorts. I’m sure there’s a way to do that to other materials, but I don’t know how to do that yet, so try it out with denim first.
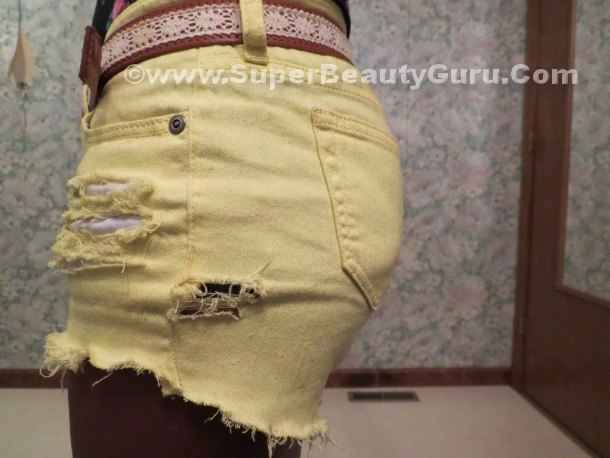
Denim shorts look really great when it’s distressed. Distressed shorts are basically shorts that have shaggey edges, rips, tears, fringe, or look worn out. Nowadays, tons of people buy shorts that look like this, or they do it to a pair of shorts/pants that they already own to get that worn look. I think this style is fabulous, and I love the outcome of my shorts!
I’ve been loving this look for such a long time, just check my Tumblr and you will see all the pairs of distressed denim shorts I have reblogged, it’s crazy. I wish I could wear short shorts like these to school because they’re so cute, and they definitely cover everything they need to, but sadly my school doesn’t allow that so I’ll just wear these during the summer or on weekends. In college I’ll get to though. I hope they still fit when I get to college!
Here are all the Steps and Tools Used in this Tutorial:
If you cannot view the above video, click here for the tutorial on this look: How To Turn Jeans Into Distressed Jean Shorts Tutorial Video
Subscribe to my Fashion and Beauty YouTube Channel!
Tools Needed
-pair of jeans
-scissors that can cut through fabric
-utility knife or box cutter
-tack, needle, or pin
Photo Gallery
Video Transcribed:
Hey guys! Today I’m going to show you how to turn your jeans into a pair of distressed shorts.
This is what they looked like before, and here’s what they look like after.
It’s really easy to make these and I’m going to show you how!
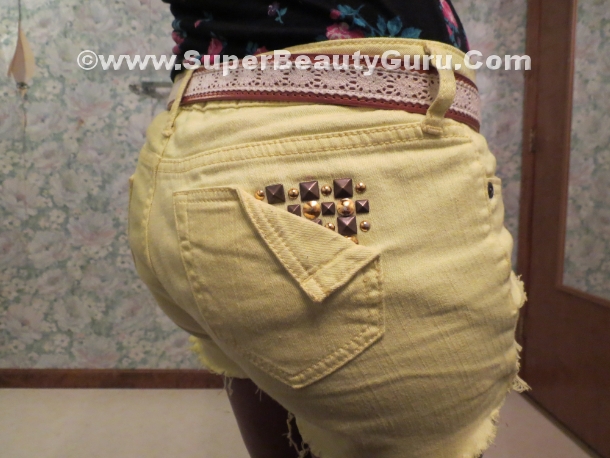
First get a pair of jeans that fit around the waist area. I’m using these bright yellow jeans from JC penny. They fit well and have cute studs on the pocket. I chose these because I got a stain on the pant leg and I tried getting it out, but even oxyclean didn’t work, so I’m just gunna cut above the stain so the pants are still usable.
Get a pencil and mark where you want to cut. Do this while you are wearing the pants so you will know how the pants will look on you once they’re cut. Make the lines on both sides even and mark the inside seams too. If you’re unsure of how short to cut them, go longer than you want so you can shorten it later, cuz you’re better safe than sorry!
Get some scissors that can cut through fabric, mine were from Walmart, and cut a little slit on one side of the shorts, at the place you marked with the pencil. Cut the front part of the pants to the inseam. Do the same thing on the other side.
Now flip the pants over and cut to the marked line. I cut the back side a little longer than the front because I’ve seen a lot of jean shorts that have longer backs.
Fold the pants over and match up the two sides, then cut the same shape on the other half of the pants. This ensures that the sides will be even. This is what your shorts should look like.
Now it’s time for the fun part. Get a box cutter or utility knife like this one, and use it to fray the edges of the shorts. If you do a back and forth motion it makes some stray strands pop out and roughens up the edges. It gives the nice frayed look which is what distressed shorts are all about!
Do this all along the edges of the pants. Be careful when using the knife near your fingers cuz it’s super sharp and dangerous. If you’re younger, you might want to get a parent to help you. Now stab it, drag it, pull it, rip it, whatever you want to do the the edges, just make them look jaggedy.
This is what it looks like after I tore apart the edges of the shorts. Pretty good huh? It’s a lot different than the other side, so it’s time to destroy that one too. Get out your knife and have fun! This process did take a little while, so be patient. It takes even longer to distress the body of the shorts!
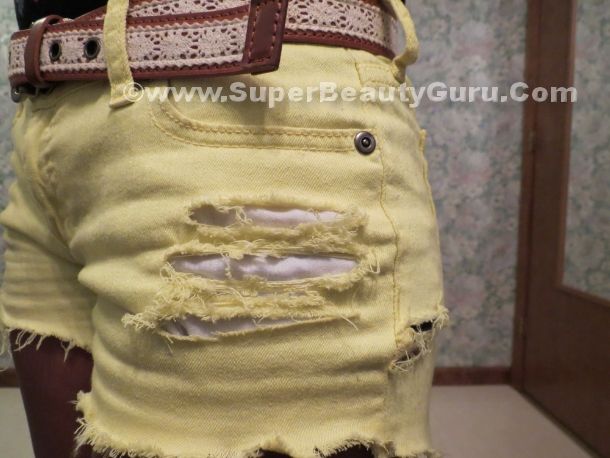
The first part I’m pulling apart is the side. This was the second flaw in my pants so I’m getting rid of it by making a slit above and below it. Then, get a pin or a tack and use it to individually pull out the horizontal threads. When you find a string that doesn’t fall out when you pull, gently pull it down keeping it attached on both sides, then keep going all the way up through the middle piece of fabric.
Eventually you will get to the point when you’re almost done and the vertical strings come out easily, so you can just pull those out instead of pulling the horizontal ones down. It’s much quicker.
Now you want to fray the edges of the slits above and below the shredded part. Now it’s nice and destroyed!
Now we’re shredding over the pocket, so pull that out through the top so you don’t accidentally cut it. Now cut three slits over the pocket area with your scissors. Do the same thing to this area that you just did to the side of the shorts. I also did this to the other side but with only two slits. This takes a very long time if you do it right, so be patient.
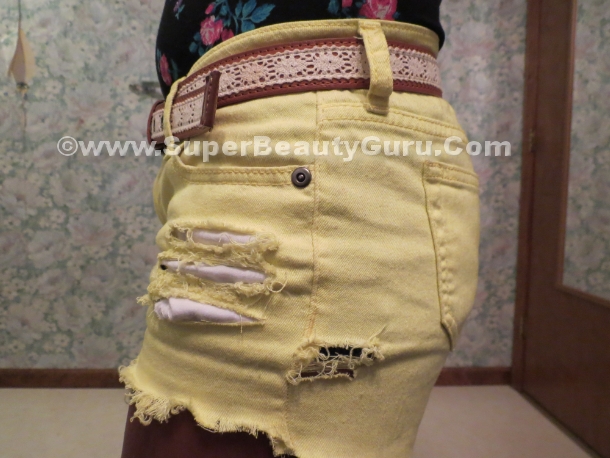
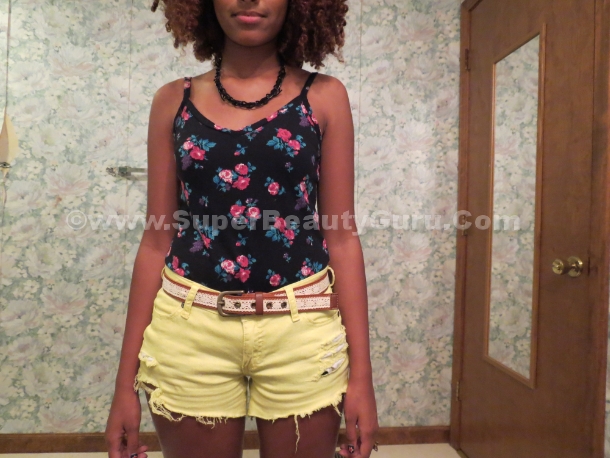
Now your distressed shorts are finished! These are what they look like on. I like how one side is super distressed, and the other side is less, so they’re not symmetrical. We’re going for a messy look so I didn’t want the sides to have the same amount of distress.
Overall, I’m really happy with how they turned out, and I’m glad I chose this pair of pants to alter. If you guys try this out on your pants, tweet me a picture so I can see your creation! Thanks for watching, and don’t forget to subscribe if you like my videos! My blog link is down below if you want to check it out, and I’ll see you in my next video! Bye!
Thanks for stopping by! Please subscribe to my blog if you like it! xoxo Amber C Johnson from Super Beauty Guru <3
