Hey everyone! Today I’m going to show you how to create a realistic looking skeleton makeup look.
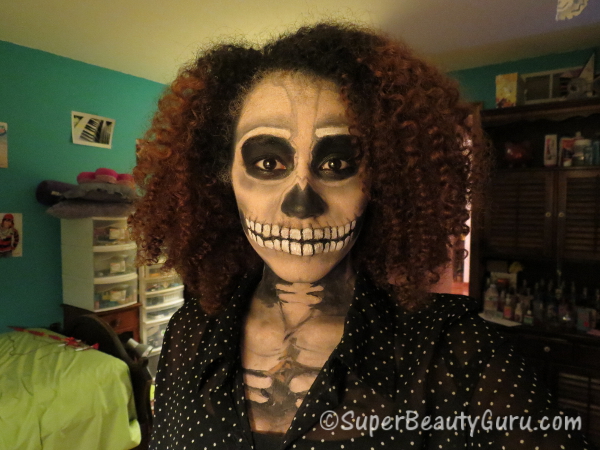
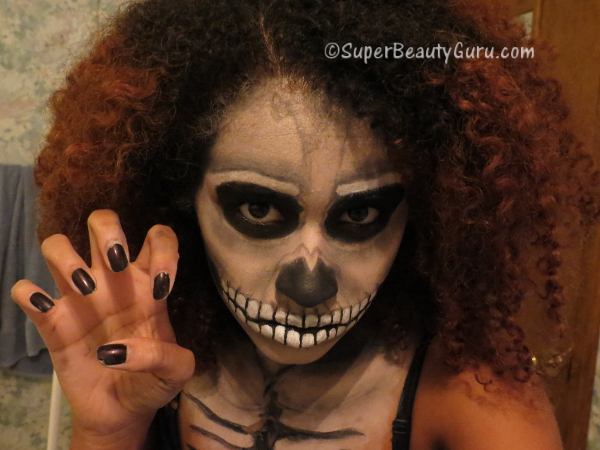
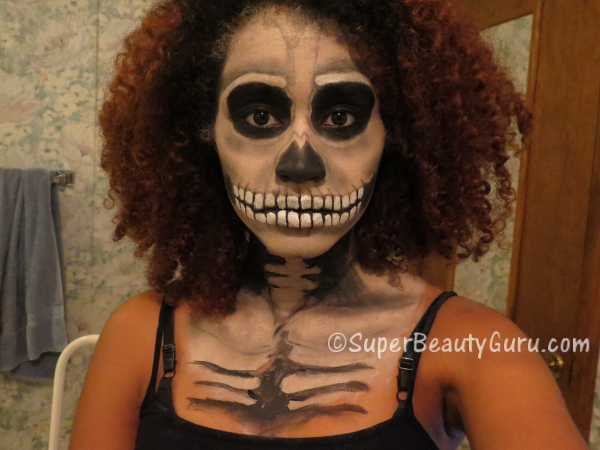
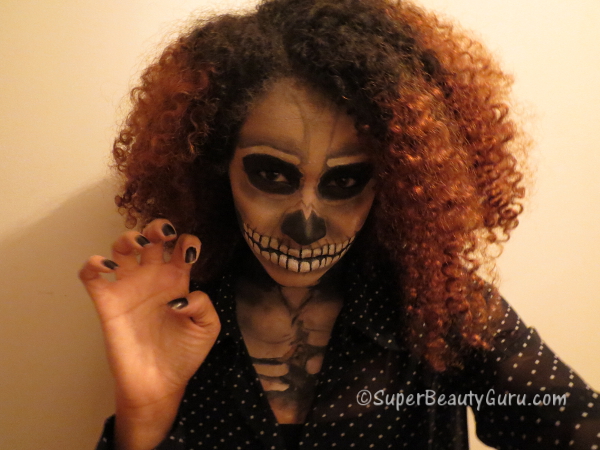
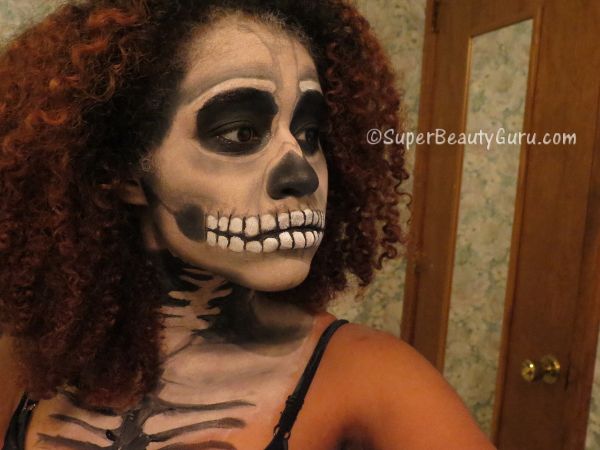
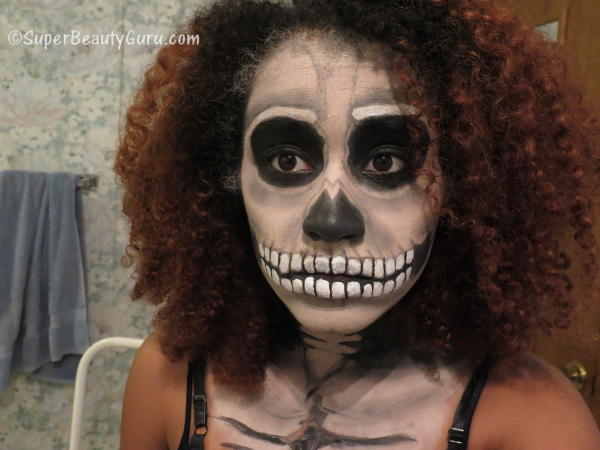
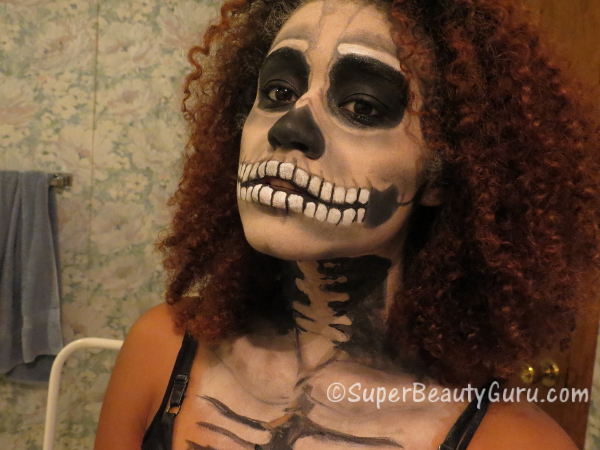
This is a great look for Halloween, and was actually what i was this Halloween. It’s super scary and will be useful if you like scaring people or freaking out your friends! I scared my friend Kaitlyn really well when she came to my house and I jumped out at her. The skeleton makeup is very detailed and included a skull and a chest of ribs. The finished look is pretty amazing in my opinion!
Here are all the Steps and Products I used:
If you cannot view the above video, click here for the tutorial on this look: Skeleton Makeup Tutorial Halloween Costume
Subscribe to my Fashion and Beauty YouTube Channel!
Subscribe by email if you like my style
Subscribe with: Feed Reader | Bloglovin’
Makeup Gallery
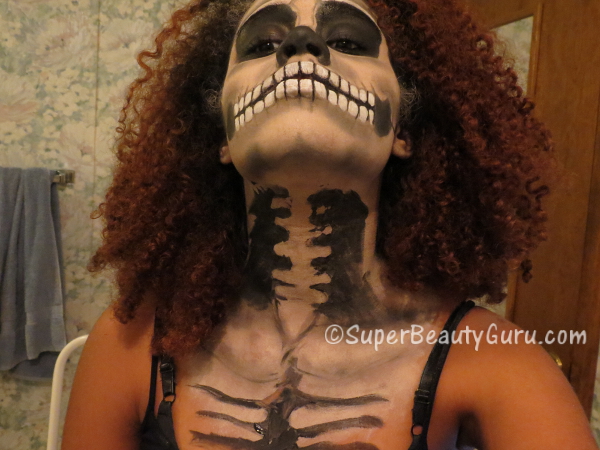
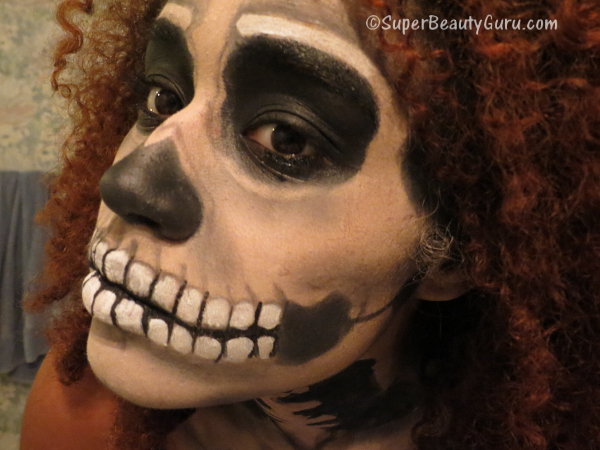
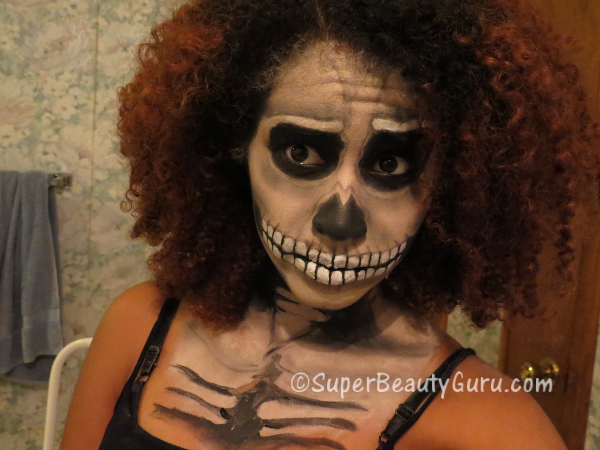
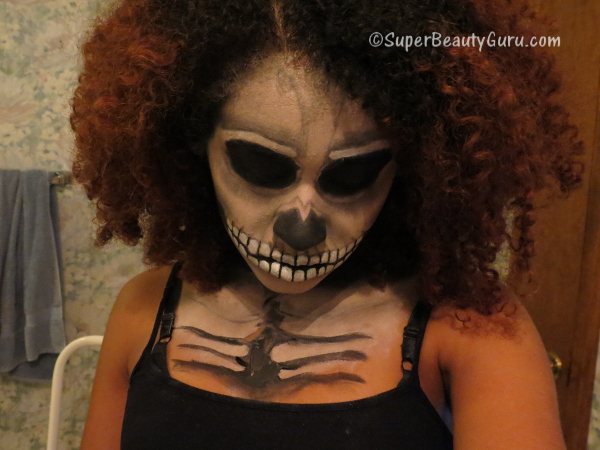
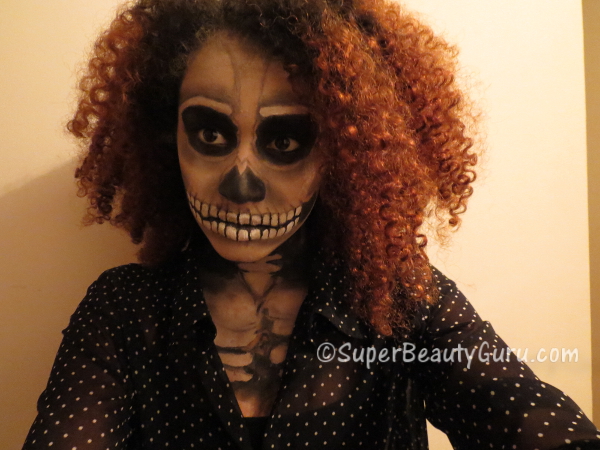
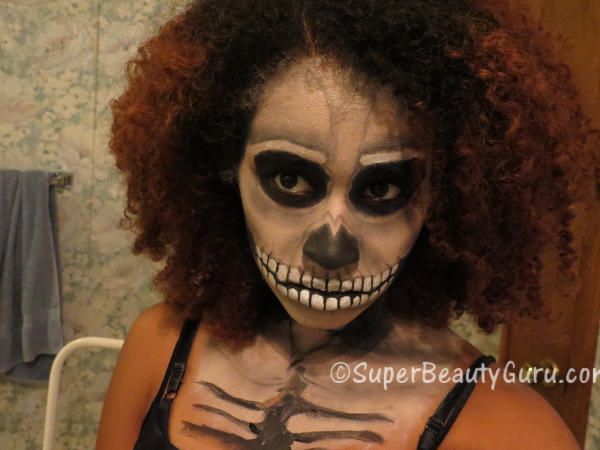
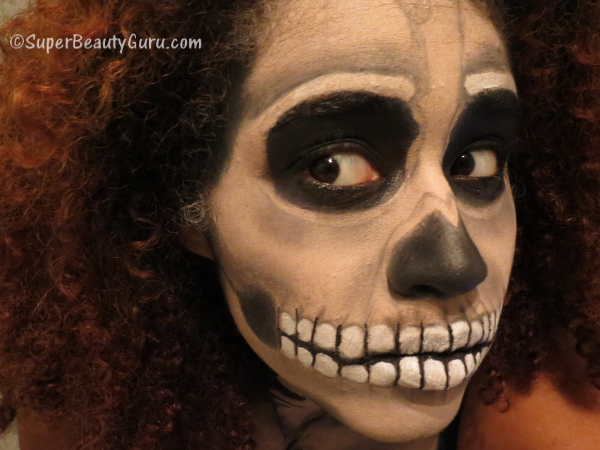
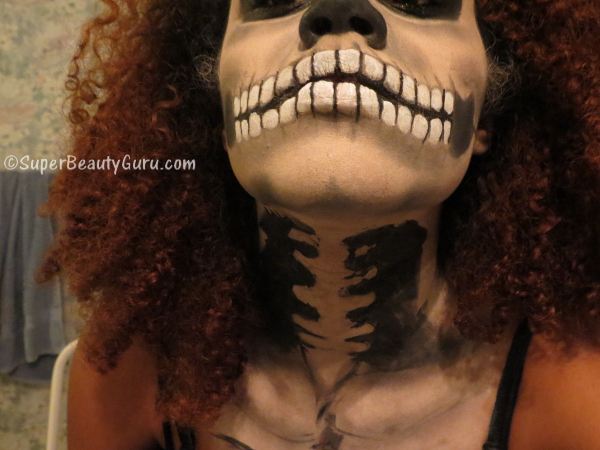
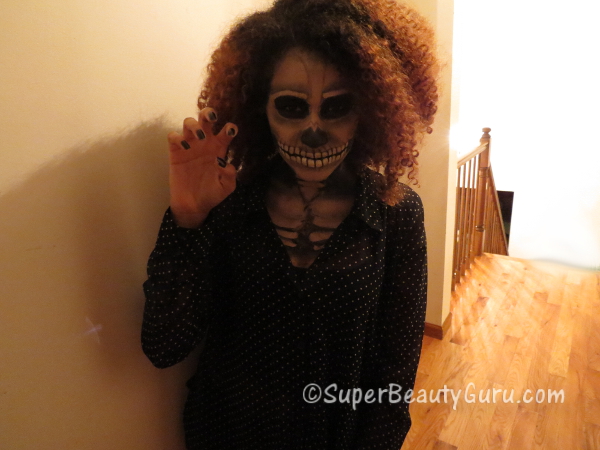
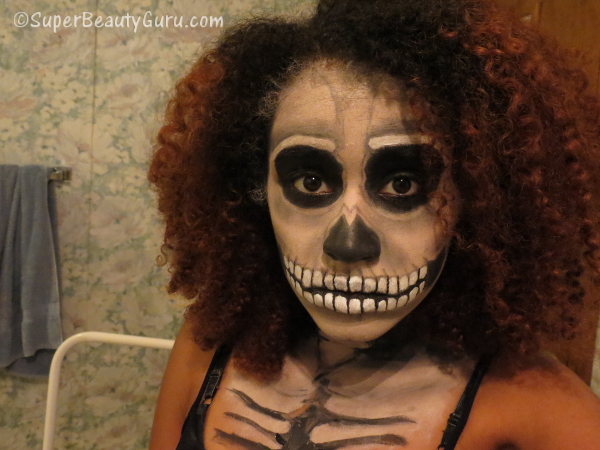
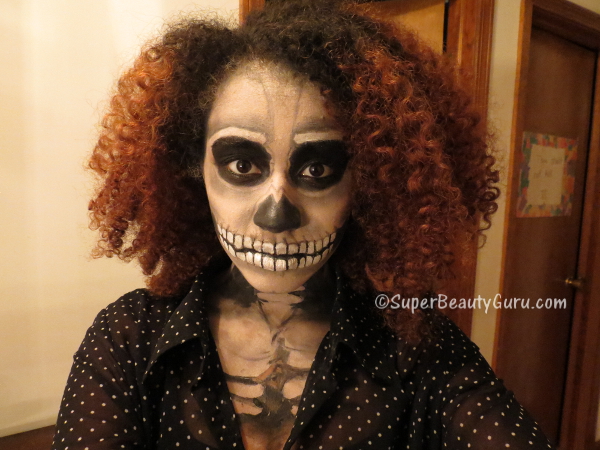
Here is one last look at this crazy realistic-looking skeleton makeup that I did for Halloween! The skull makeup will totally amaze your friends, so you should try it out! The face paint is also really easy to work with.
Related Posts:
Video Transcribed:
Hey guys! Today I’m going to show you how to do costume makeup to make yourself look like a realistic skeleton! I did this creepy makeup for Halloween this year and everybody loved it, so if you want to impress your friends, this is the tutorial for you! In this look I used shading and highlighting to create a realistic facial structure that really looks like a skeleton. It took me about two and a half hours to complete the look, but it was so worth it in the end. Stay tuned to find out how to make yourself look like a skeleton!
Wow I look good! But not for long- it’s time to get ugly! Take a mixing palate and a tube of white and flesh-toned face paints. Add some of the skin-toned one to the plate, then add about three or four times that amount of white. You want to create a really light base color that’s off white because that is more realistic, and it will make it possible for us to highlight areas like teeth and the brow bone later.
After mixing the colors together, use a makeup sponge to apply the color all over your face. You want to apply a few layers of the color because it won’t be opaque enough in just one layer. Make each layer really thin and as even as possible. Whoa my hair magically went up. If your hair gets in the way, you can put it up in a ponytail. Mine just goes up cuz I have magical powers but you can use a hair scrunchie to get it out of the way for now.
Don’t forget to paint your neck and chest with your base color. Now I started adding a second layer on top of everything. I ended up using three layers, which should be enough to make your skin color opaque. So here’s the third and final layer of color that really made my skin look white. This step is one reason why it took so long to do this makeup. It’s not hard, it’s just time consuming.
Apply a lip balm right now so while you are doing the rest of your face, your lips will be moisturizing because when you put the makeup on them they will get really dry. I used a ChapStick in the flavor “green apple”.
Now take a translucent face powder, mine’s from E.L.F., and pick this up on a face brush. Dust this all over your face to set the makeup. It’s like setting your foundation. You have to do it so it doesn’t smudge, get oily, or fade throughout the night. Make sure you do this after the face paint has dried because if it is still wet when you powder your face you will get clumps of makeup stuck to your brush and face which is not what we need when you need to get your makeup done for that party you’re going to later! Powder your face really well to prevent your makeup from going anywhere.
Next, take a black shadow base like this NYX jumbo eyeshadow pencil in the shade “black bean”, and use this to outline the shape of the eye cavity. Start by going over your eyebrows and then extend the circle down. Close it off underneath your eye. Now fill it in with your jumbo pencil. If you want, you could use a brush to apply this, but I’m going straight from the tube. You don’t have to be neat with this because we’re going to blend it out later. Don’t get every area on your lids, or apply too much or it will end up smudging. Now use a synthetic haired brush, this one happens to be a paintbrush that works very well with makeup, and use this to blend and even out your circles.
Now take a black eyeshadow, this is my blackest one from L’Oreal, and use this to set your eye makeup. Use a new blending brush to do this because the other one is wet, and you’re going to use this brush to blend out some more shadow later.
For the nose, use a black pencil liner to outline the area that the nasal cavity would be. Start by making a V shape in the middle of your nose, then tracing around the outside of your nose. Load up your synthetic brush with the black eyeshadow base, and paint between the lines on your nose. Use it to smoothe everything out, and add more of the base to make your nose as black as you can. Get more of the black shadow and use it to set your nose so it won’t go anywhere. And try not to touch your nose throughout the night like I did. I would accidentally touch it, forgetting that it was covered in makeup and wonder why I had black hands…
Now it’s time to cover the lips. Use the same mixture of face paint as before, hopefully you have some left, and sponge a layer on top of your lips. I waited to do this step until now because it dries out your lips and dry lips aren’t fun. Now set them with the same powder.
Start drawing in the teeth by making a line in the center of your lips with the black base, or eyeliner. Continue making lines across your lips that are the width of teeth. Extend them above and below your lips, and evenly space them. Now extend your mouth out by making a horizontal line on both sides of your mouth, and add more teeth. Give each side the same amount of teeth.
Now take a black liquid liner and use this to darken the lines you made. The first set of lines were an outline, so now that you know where you want them it’s time to emphasize them. Once you’re all done that, add some liner to the area where your lips meet. Now start curving the teeth. Teeth aren’t shaped like rectangles, so add a curve to the top of your bottom teeth to make them look more realistic. Continue doing this to the bottom of your top teeth as well.
Once you’re done that, squeeze out some pure white face paint, and use this to fill in your teeth. This is why I made the skin tone slightly off white, so the teeth would be able to contrast against the face, and really pop. I used a tiny synthetic-haired brush that’s great for detail. It made it easy to round off the teeth, but if you don’t have one, you could use a q-tip.
Now use a thin eyeliner brush and a black eyeshadow to add shading. You want to shade around the top of your teeth, then extend the vertical line, but angle it towards the center of your face. Do this for all of your teeth on top and on bottom.
Next we’re going to add black eyeliner where the bone would be really sunken in on a skull. You can really feel the shape of it by pressing on your own face to see where it sinks in. Draw a shape like this one and fill it in. Do the same thing on the other side of your face. Set these spots using the black eyeshadow so they don’t smudge.
Do the same thing to the area near your ear and the space between the two. Use the eyeliner brush to add more detail around the face and emphasize the sunken in areas and bone shapes. I looked at pictures of skulls to see exactly what I wanted to emphasize.
Use the white face paint to highlight your orbital bone and make it look like your forehead is more protruding than your eye socket. Fade the white out at the side and use black eyeshadow to shade around it. Blend out the shadow to soften the effect. Add some shading to your temples and make sure to set them. Make two thin lines going from your eyes up to your forehead with the black shadow.
Pick up a little bit of the shadow on a blending brush and use this to lightly contour your cheeks to make your cheekbones more pronounced. Also use this to contour your chin and jaw line. Add some shading around the nose as well. Outline around the eyes with the thin brush and use the blending brush to soften the lines and fade it out underneath. Also blend around where smile lines would be and underneath the teeth.
Now it’s time to start on the neck and chest. Here I’m making the spine which I outlined in pencil first and am now filling in with black face paint. Blend that out on the sides as far as you want to go. Then I started contouring my collarbone with the black shadow and blending brush. On my chest I used the paint to make ribs then filled in the space between them. And now you’re done with the look!
Now you are a fierce, scary looking skeleton and you’re ready to go out and scare little children! I actually did scare a couple. You should have seen my friend Kaitlyn’s face! She was so scared cuz it looks so real right? If you guys try this out please send me a picture on twitter cuz I would really love to see people try out my design!
Now all you have to do at this point is add a black button-up top with enough buttons open so that it will cover your skin and only expose the makeup-covered area. This design is not very hard to do, but just make sure you have a lot of time on your hands. You can take down your hair now too. This is the shirt I wore with the outfit so you can only see the area with makeup on it so it looks like my whole body would be a skeleton.
Ooh special effects! It looks really cool like that and really brings out the creepiness! It looks like I’m a real skull in these! Anyways, thank you so much for watching, and I’ll see you in my next video! Bye!!
Thanks for stopping by! Please subscribe to my blog if you like it! xoxo Amber C Johnson from Super Beauty Guru <3


Pingback: Sugar Skull Day of the Dead Makeup Tutorial (Dia de los Muertos) | Super Beauty Guru